Behind the Build: Transforming a Living Space with Seamless Drywall Remodeling in San Diego
Whether you are redefining an open layout, improving room acoustics, or refreshing outdated architecture, building a new interior wall requires meticulous attention to detail from the studs to the final coat of paint.
Here is a behind-the-scenes look at how AC Remodeling transformed this vaulted living room in San Diego, taking it step by step from bare framing to a pristine, painted finish.
Step 1: Precision Framing and Structural Preparation
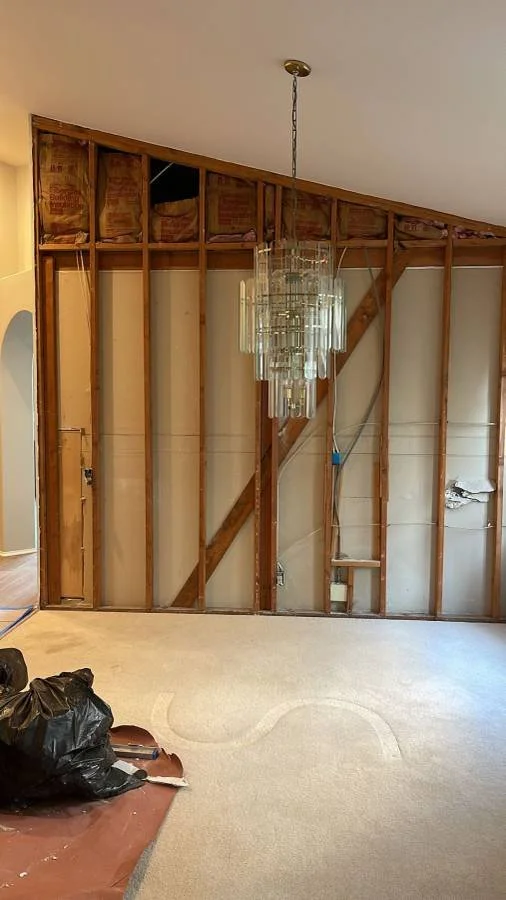
Every lasting remodel starts with a solid foundation. In this space featuring an angled, vaulted ceiling, the challenge was to establish a secure dividing wall that matched the existing architectural lines without disrupting the room's high ceilings and classic crystal chandelier.
Stud Alignment: Structural wooden studs were measured and set to support new sheetrock securely along the sloped roofline.
Insulation & Wiring: Upper bays were insulated for sound and thermal efficiency, while electrical conduits were properly routed to ensure all outlets and fixtures remained functional and up to code.
Protecting the Space: Protective floor coverings were laid down early to safeguard carpets and adjacent flooring throughout the process.
Step 2: Hanging, Taping, and Mudding Drywall
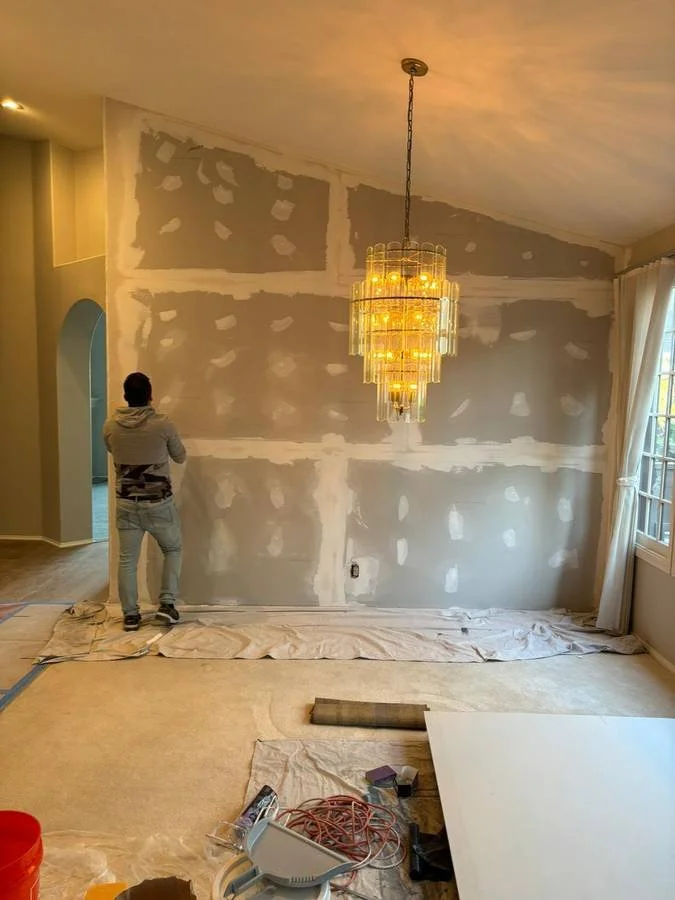
Hanging drywall on a high, angled wall demands precision cuts and expert mudding technique to prevent cracking and visible seams over time.
Sheetrock Installation: Heavy-duty drywall panels were hung flush against the framework, accommodating cutouts for electrical outlets.
Taping and Joint Compound: The crew taped every joint and applied joint compound across all seams and screw indentations.
Multi-Coat Feathering: Multiple thin coats of mud were layered and feathered out wide across the wall surface. This step ensures that once sanded smooth, the wall will appear completely flat without noticeable transitions under direct light.
Step 3: Sanding, Primer, and Flawless Interior Paint
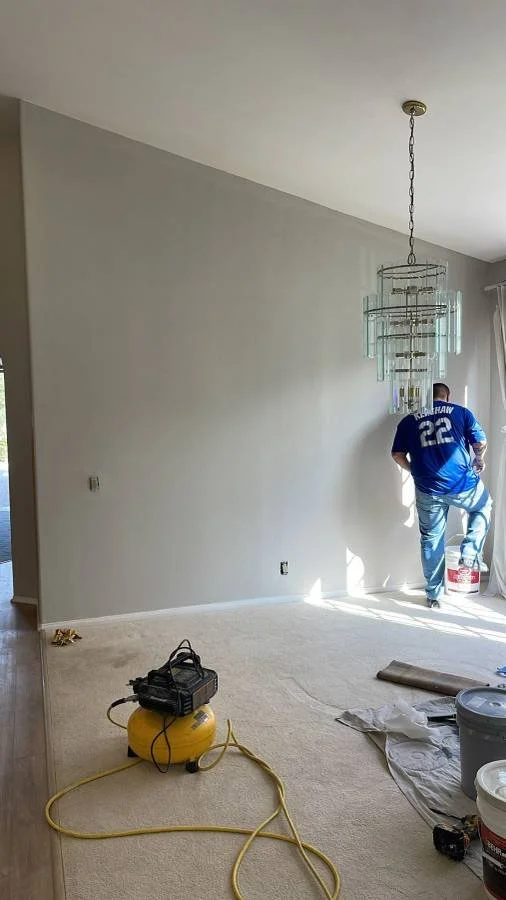
The final transformation relies on patience and clean application. After the joint compound fully cured, the entire surface was fine-sanded to a uniform texture.
Dust Control: Floors remained protected while drop cloths collected sanding residue, followed by comprehensive surface cleaning before any paint touched the wall.
Sealing & Priming: A dedicated drywall primer was applied to seal the compound, creating an even absorption profile across both bare paper and patched mud.
Finished Finish: Two coats of modern, neutral wall paint were applied, complemented by crisp baseboard trim and cleanly finished edges where the new wall meets the vaulted ceiling.
The result is a completely integrated accent wall that looks original to the home, adding both structure and quiet elegance to the living room.
Plan Your Next Home Renovation
From minor drywall repairs to custom interior partitions and complete home renovations, quality craft makes all the difference. Contact AC Remodeling in San Diego today to bring precision and polish to your next interior remodeling project.